Painting your radiators may not be an idea you’ve come up with before, but if the radiators in your home are still functioning right but just don’t look the way you think they ought to look, painting them might be just the solution you’re looking for.
Radiators are items we often don’t think much about because let’s face it; they aren’t exactly there to make the room look better.
Nevertheless, when they get old and are starting to become an eyesore, painting them is an inexpensive but very efficient way to make them look better instantly when radiators looking tired, and it’s a lot easier to do than you think.
Table of Contents
Is it Complicated To Paint A Radiator?
The process for painting a radiator is no more complicated than painting just about anything else in your home.
Adequate ventilation and the proper tools are a must if you want the job to be a success, and any other tips for painting a radiator are just as simple. The good news is, once you’ve painted the first radiator, you’ll already know how to paint the rest of them, which means the remaining jobs should be a lot faster and simpler.
While we’re on this subject, it’s good to know that if you’re planning on painting one radiator, you might as well paint all of them in your home because if one of your radiators starts to look bad, it won’t be long before the rest of them start to look the same way.
Why do people paint their radiators? For various reasons. Some paint them because they are starting to look bad, while others want to make them stand out in a particular room.
Still, others want the opposite – radiators that blend into the room or complement the rest of the room.
Whatever your reason is for painting your radiators so that your radiators looking tired, you can achieve that goal with the right tools, the correct paint, and with a little know-how.
Should You Use a Particular Type of Paint For Painting A Radiator?
If you’ve ever wondered, what is the best paint for radiators, the answer is simple.
There are speciality paints made just for radiators, and you should use those whenever you can. This is especially true when you want to paint your radiator white.
The best paint for painting radiators you are best you use enamel paint therefore based on customers ratings, the two best paint are:
Using any other type of white paint is very likely to turn the radiator a yellowish colour at some point, and this rarely looks good.
If you decide not to use radiator paint because you’ve chosen a colour other than white, here are your options:
- Clear radiator overcoat. This product is made by a company called International, and you start by painting an ordinary emulsion paint onto the radiator, then use the overcoat to make sure there is a protective coating over the paint.
- Solvent-based paints. These include non-drip gloss or satinwood paints, and the good news is that these types of paints are available in just about every colour you can think of, so you’ll have plenty of options available to you.
- Spray paint. You should use the ones that are specifically formulated for radiators. Unfortunately, there isn’t a massive selection of colours available in spray paint form, so you are limited when it comes to how you want your radiator to look when the job is done.
If you choose spray paint, make sure you wear a mask and gloves because spray paint can drip while you’re using it.
You should also put down a lot of newspaper on the floor because spray paint tends to drift and is often difficult to control as you use it, causing it to fall on the floor frequently.
Can I Paint My Radiator Pipes?
First, you will need to cover the pipework with a primer before painting the pipes with a matt or gloss paint it is best to leave the radiator off while painting and then leave the radiator for a few days after the pipes are painted to stop the paint from drying to quickly and cracking.
How Long Should The Primer And Paint Coats Dry In Between Each Coat?
A minimum of 24 hours, or until each coat is dried thoroughly. After you’re finished, however, you should keep the radiator off for several days before turning it back on again. While you’re doing this, make sure the room remains well-ventilated.
Does The Colour I Choose Affect The Radiator’s Ability To Emit Heat?
In a way, yes. Some colours may cause the radiator to emit less or more heat. A metallic-based paint, for example, causes the radiator to emit less heat than standard paint does; however, the difference between the two varies depending on the radiator and the paint used.
Step-by-Step Guide to Painting Your Radiator
Painting your radiator isn’t that complicated, but you do need to adhere to some basic rules throughout each step of the process. Here are the steps required to follow if you want your radiator painted:
- Make sure the area is well-ventilated. Open some doors and windows to make sure you aren’t breathing in paint fumes the entire time you’re working. This is common sense, of course, and it is especially important if you choose to use spray paint for the job.
- Make sure the radiator is turned off and cold. Not only should you turn the radiator off, but you should also make sure it remains off until the paint is completely dry. Even if the radiator is just a tad on the warm side, it can ruin your paint job, so make sure it is completely cold before you start working.
- Protect the area surrounding the radiator. Move nearby furniture away from the radiator and put newspaper or cardboard down on the floor. Remember, spray paint can end up where you least expect it, and even regular paint can drip or go flying at some point, so make sure the area surrounding the radiator is clear to protect other items from getting splattered with paint.
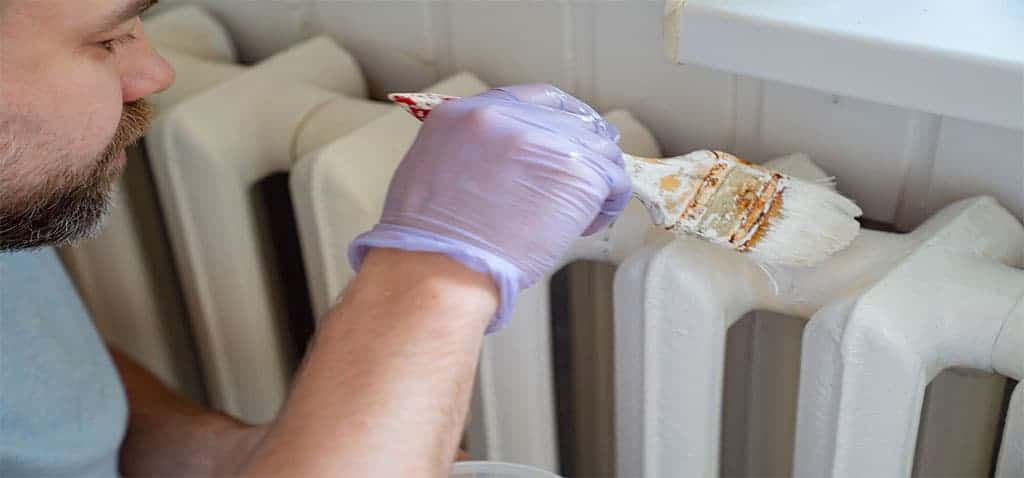
- Make sure the radiator is clean. Over the years, your radiator has undoubtedly picked up a lot of dirt and grime so that it will need a good cleaning. Use a sponge and soap and water if you need to, but make sure it is cleaned thoroughly so that no debris is left on it. After it is clean, dry it off then sand it lightly with sandpaper. Before you go any further, make sure the radiator is clean, dry, and lightly sanded. After you sand it, wipe it with a damp cloth so that all of the extra grit comes off.
- Time for your radiator primer. The primer is essential because it directly affects how the paint is going to look. When you’re painting, go up and down the radiator instead of across so that you get less drippage. You also get a much more even coat this way. If you have any rust spots that you couldn’t get off when you were sanding it, you might need to use an anti-corrosive primer instead. Let the primer dry completely before you go any further.
- Your first coat of radiator paint. After the primer dries, wipe down the radiator with a dry cloth, then apply your first coat of radiator paint. Again, apply the paint up and down evenly, and make sure you don’t put too much paint on the brush. After you’re finished, make sure you let the coat dry completely before going any further. You can apply a second coat afterwards if you like, but in most cases, it isn’t necessary.
Once you’re done, you’ll want to make sure the paint is completely dry before turning on the radiator.
Remember to keep the radiator off and make sure it’s cold before you start the process, and the rest should be simple.
Some Tips to Remember When Painting Your Radiators
While most of this process is very simple, you have to remember that it is essential to conduct each step exactly as it is written.
Making sure the radiator is turned off and stone-cold, cleaning it thoroughly before getting started, and letting it dry completely between each coat are all significant steps that can help ensure the radiator turns out just like you wanted it to.
Making sure you wait two to three days after the process is finished before using the radiator again is also essential.
Each of these steps is crucial if you want to have a great-looking radiator in the end.
Fortunately, each of these steps is easy, and the process is inexpensive as well. Nothing you have to use during the painting process is necessarily expensive, so you can look forward to completing the project without spending a lot of money.
In addition, this type of project can be fun. When you consider how many paint colours there are to choose from, you’ll quickly realise that the possibilities are endless when your goal is to end up with a gorgeous radiator that highlights and complements the room like nothing else does.
DIY tasks that needs to be done for more help and advise on the other homeowners maintenance then i have a full in-depth guide for you – Our Grant New Homeowners Maintenance Guide