If you have a dripping tap, you know how annoying this can be, what if I could show you how to fix a dripping tap in under five minutes?
I have been a plumber for over 20 years and have seen all sorts of dripping tap-to-tap that just will not turn on, and even some that just won't turn off and I can tell you fixing a dripping tap is very simple for the most part.
I will go into more detail about how to fix a dripping tap but first here are the step you will need to take
- Turn off the water supply to the tap
- Unscrew and remove the tap head
- Using a spanned remove the tap cartridge from the tap body
- Replace the washer and clean the tap cartridge
- Insert the cartridge into the tap body and tighten
- Put the tap head back onto the tap cartridge
- Turn on the water supply
Let's look at these in more detail, as I have simply gone through the steps of a standard tap which has a tap washer whereas a lot of taps these days have ceramic tap cartridges.
Table of Contents
How Much Does It Cost To Fix A Dripping Tap?
If you were to ask qualified plumbing to fix your dripping tap, you would be looking to pay between £65 and £100 with the most expensive price being in London
The price is just to fix a dripping tap; however, if you have a more elaborate style tap, then the price will be much higher, this is due to the plumber requiring parts.
If the dripping tap is a ceramic disc tap, then the chance of a repair is less likely as these taps an utterly different from a standard tap washer and in most cases the whole tap cartridge would need to be replaced
In some cases where the tap is an unknown brand, this can make a repair even more problematic and in most cases requires a new tap altogether.
Tools you will need to complete the task
- Flathead or Phillip head screwdriver
- Adjustable Spanner
- Replaced Washers
- Grease
What Style Of Tap Do You Have?
Before starting this task, you will need to determine what style of tap you have there mainly two different types are
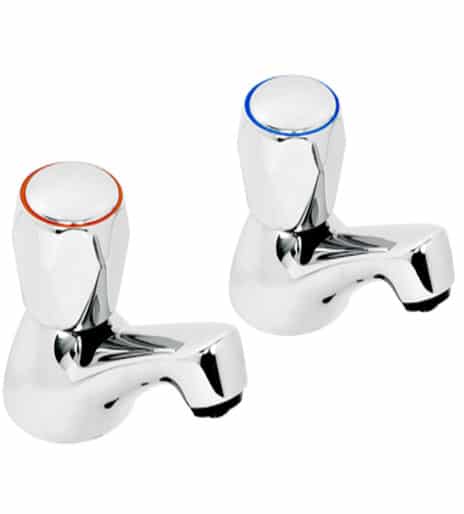
- Standard Tap
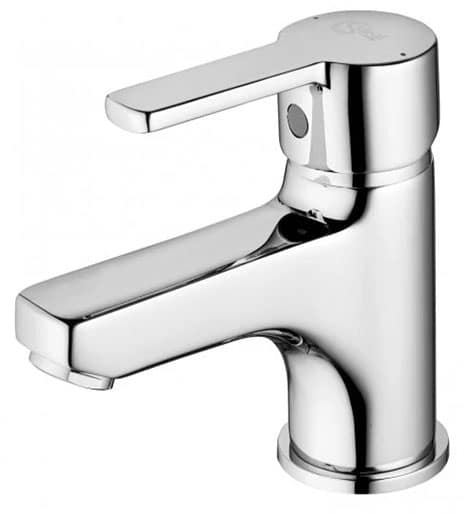
- Monobloc Mixer Tap
For the standard tap, you will have two separate taps, one for the hot and one for the cold weather the tap is on one tap or two individual taps the process will still be the same.

A monobloc mixer tap, however, is where you have one tap where you lift a lever and twist for hot and cold water.

What Is The Cause Of A Dripping Tap?
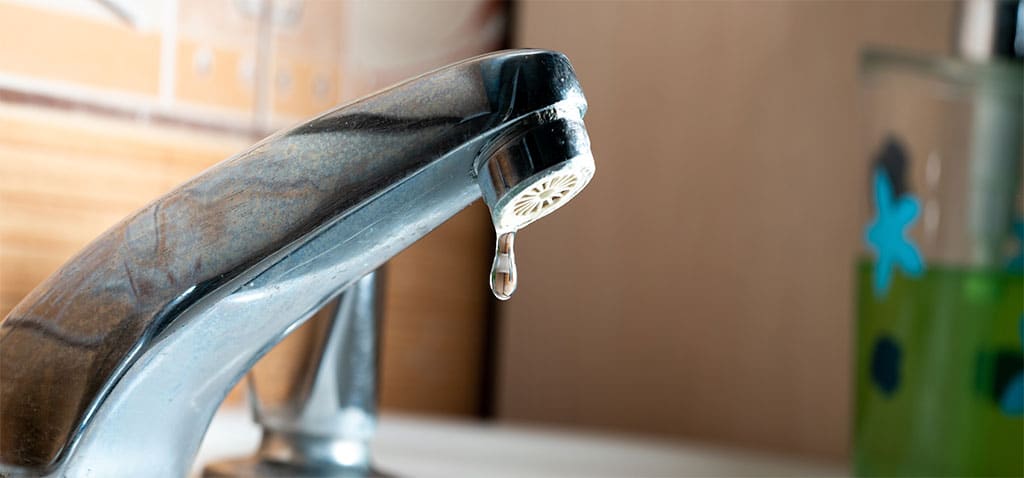
A dripping tap is caused by a worn-out washer the washer gets worn because as the tap is turned on and off the washer gets pushed against the tap seating causing it to wear out.
If you have a standard more traditional style of tap, the dripping will be because the washer has worn and will need to be replaced
If you have a monobloc mixer tap, then the leak is because the ceramic disc cartridge has gone wrong and that will also need to be replaced.
Don't worry; you can still fix both styles of taps following this guide.
Please Note - With some monobloc mixer taps, you are not able to change the cartridge if you don't know the make or model of the tap, this is because not all tap cartridges fit all taps
If you are unable to change the tap cartridge because of the reason above, then I would recommend you don't try to fix it as you will require a new tap.
For a guide on how to install a new tap, please follow this guide I have for you
Will A Dripping Tap Get Worse?
A dripping tap will start to drip and even start to run even when the tap is turned off, this is the most common tap problem, and over time a dripping tap will begin to progressively get worst where sometimes the tap will not even turn off
Let's get started.
Turning Off The Water Supply
Before you carry out any plumbing work, you will need to turn off the water supply, and this can be done by turning off the isolation valve on the pipework to the tap if you have one.
If you don't have an isolation valve, you will need to turn off the water supply to your home.
Unscrew And Remove The Tap Head
This part is where things will change whether you have a standard tap or a monobloc mixer tap.
First let's look at the standard more traditional tap, using a screwdriver remove the tap head from the tap cartridge, this can be located under a cap on the tap head which will have a red and a blue ring around the top.
Tap heads can sometimes be quite tricky as they can get stuck, if you find you are unable to remove the tap head, then you can use WD40 or even boiling water.
Once you have removed the tap head, you will see a brass valve underneath with a spindle; the spindle will be granted to allow the tap head to work the spindle.
For a Monobloc mixer tap, you will need to locate a small screw which can sometimes be found under a small cap on the front of the tap which will be colour red and blue.
Inside there will be a small screw called a grub screw these can be either a flathead screw of an alan key screw.
Once you have unscrewed that screw, you can now lift off the lever head.
There will be a small ring around the plastic tap cartridge that will be holding the cartridge in place.
Removing The Tap Cartridge
Standard tap – using an adjustable spanner turn the tap cartridge valve until it is loose enough to remove by hand.
Removing and installing a new cartridge for a monobloc mixer tap, slowly unscrew the ring and then pull the cartridge out now you can replace the plastic tap cartridge making sure to also replace the washer at the bottom which in most cases looks like the number 8.
Replace The Washer And Cleaning The Tap Cartridge
Once you have removed the tap cartridge from the tap, you can now start to clean and replace the tap washer
First, remove the clip holding the spindle into the valve body, then pull out the spindle and jumper and clean all the muck off the valve and the jumper.
Once you have cleaned the valve, you will now need to apply grease around the screw threads on the jumper.
Now insert the jumper back into the valve body and replaced the washer at the bottom
Now you are ready to insert the tap cartridge back into the tap and tighten make sure not to overtighten the tap cartridge
Refitting The Tap Head
Push the tap head back onto the tap cartridge and tighten back up make sure not to over-tighten the screw
Turn On The Water Supply
Just simply turn on the water supply and your tap will be all up and running again
If you have a ceramic disc tap cartridge the process is the same however instead of replacing the tap washer; you will need to replace the full tap cartridge
You can buy full kits for both the tap cartridges and tap heads if the tap head doesn't fit the new tap cartridge these are called tap revival kits.
they come in two different types a standard tap revival kit and a lever tap revival kit
Why Does My Tap Still Drip After Changing The Washer?

If after you have changed the tap washer, you find the tap is still dripping, this is because the tap seating inside the tap has been damaged allowing water to pass between the new tap washer and the tap seating.
If this is the case, you will need to change the tap or re-seat the tap.


